5 Balance Drills That Make Getting Up Off the Floor Easy Again
Quick Answer: Getting off the floor requires four things at once - hip and ankle mobility, single-leg strength, trunk control, and the balance to shift weight through an unstable transition. Most people who struggle are missing only one of the four, and the fix is to train the transition itself rather than general leg strength. Five progressions below, from a supported kneel-to-stand up to an unsupported floor-to-stand, each of which can be done in a living room with a chair. Practise two or three times a week and expect real change within a month.
It is the movement nobody trains until they cannot do it. The good news is that it responds fast, because most of the deficit is skill and confidence rather than raw strength.

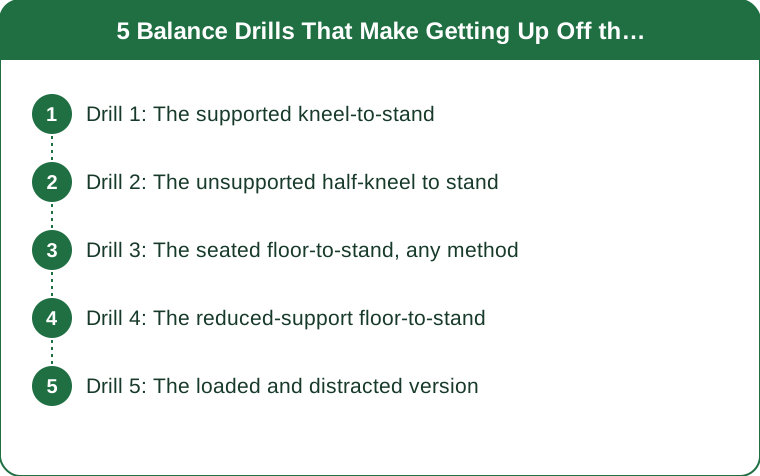
Drill 1: The supported kneel-to-stand
Start here regardless of how strong you feel. This drill teaches the transition pattern with the safety of a hand on something solid, and the pattern is the part most people are actually missing.
Set up: a chair or a sturdy table in front of you, a cushion or folded towel under the knees, and enough clear space to fall safely in any direction.
The movement: from a tall kneel with both knees down, step the right foot forward into a half-kneel. Push through the right heel and the left toes to stand, using the chair as light support - fingertips, not a grip. Reverse slowly to return.
Reps and sets: 5 each side, 2 sets, resting as needed. Alternate the lead leg deliberately, because almost everyone has a strong preference and the weaker side is the one that matters.
What to focus on: the reversal, not the rise. Lowering back down under control is where most of the strength and balance is built, and it is the part people rush by dropping onto the knee.
Progression marker: when you can do 8 controlled reps each side with fingertip support only, move to Drill 2.
Drill 2: The unsupported half-kneel to stand
Same movement, no hands. This is where the balance demand appears, and it is a substantial step up from Drill 1 despite looking almost identical.
Set up: keep the chair beside you rather than in front, close enough to grab but not close enough to lean on. Cushion under the knee.
The movement: from half-kneel, arms crossed over the chest or reaching forward for counterbalance, drive through the front heel and stand without touching anything. Lower back to half-kneel with control.
Reps and sets: 5 each side, 2 to 3 sets. Stop the set when the quality drops rather than when the count is reached.
What to focus on: the front foot position. If the knee travels well past the toes and the heel lifts, the foot is too far back. Step the front foot further forward and the movement becomes both easier and safer.
Use the arms deliberately. Reaching the arms forward as you rise shifts your center of mass over the front foot and is a legitimate technique, not a cheat. Learn it as part of the skill.
Progression marker: 8 clean reps each side, no wobble that requires a hand, and controlled lowering throughout.

Drill 3: The seated floor-to-stand, any method
Now start from the floor itself. Sitting on the floor and standing up is a genuinely different challenge from kneeling, because the first phase - getting from seated to a kneeling or squatting position - requires trunk control and hip mobility.
Set up: clear floor, mat if you have one, a chair within reach as a bail-out.
The movement: sit on the floor in whatever position is comfortable. Get to standing however you like - roll to a side, push to a hand-and-knee position, come to a half-kneel, then stand. Any method counts at this stage. Then sit back down with control.
Reps and sets: 5 repetitions, 2 sets, resting between reps. This is more taxing than it looks.
What to focus on: finding your most efficient route and repeating it. Everyone has a preferred pathway, and repeating it builds the specific coordination for it. Explore two or three options in your first session, pick the one that feels most controlled, and drill that.
Sitting down matters as much as standing up. The descent is the phase where falls happen, and controlled lowering is a trainable skill. Never let yourself drop the last few inches.
Progression marker: 8 repetitions with the same method, no hand on the chair, and a controlled descent every time.
Drill 4: The reduced-support floor-to-stand
Now remove support progressively. The classic assessment version of this movement scores how many points of contact you use - hands, knees, forearms - and reducing those points is a clear, measurable progression.
Set up: same as Drill 3.
The movement: stand up from the floor using one hand only. Then, when that is reliable, no hands - only knees and feet as contact points. The route stays the same; the support decreases.
Reps and sets: 5 repetitions, 2 sets, with a full rest between. This is the hardest drill on the list for most people and the one with the greatest carryover.
What to focus on: momentum control. Without hands, the temptation is to throw the body up using speed, which is exactly the pattern that produces a stumble at the top. Slow it down and let the legs do the work.
Scale it honestly. If one-hand is not close, spend three or four weeks at Drill 3 rather than forcing this. There is no benefit to attempting a progression you cannot control, and a fall during floor practice is the outcome this whole program is designed to prevent.
Progression marker: 5 controlled repetitions with no hand contact, in both directions.
Drill 5: The loaded and distracted version
Real life does not happen in a quiet room with empty hands. The final progression adds the two variables that make a real floor-to-stand harder: carrying something, and being distracted.
Set up: same clear floor. A light object - a book, a folded towel, a small bag - and a timer or a conversation.
The movement: stand up from the floor while holding the object in one or both hands. Then, separately, stand up while counting backwards from 50 in threes, or while talking.
Reps and sets: 5 repetitions of each variation, once or twice a week.
Why the distraction matters: the cognitive load version is a well-established concept in balance research - performing a motor task while managing a mental one is substantially harder and is closer to how falls actually happen. If you can only rise from the floor while concentrating completely, the skill is not yet robust.
Why the load matters: getting up while holding a grandchild, a pet, a bag of shopping, or a phone is the realistic scenario. Training it in isolation and hoping it transfers is optimistic.
Progression marker: you stop noticing. When rising from the floor while carrying something and talking is unremarkable, the skill is where you want it.
Programming all five: two or three sessions a week, 10 to 15 minutes, working at whichever drill is currently at the edge of your ability with one easier drill as a warm-up. Progress the drill, not the session length.
This is general information, not medical advice. If you have had a fall, have significant joint pain, are recovering from surgery, or feel unsteady standing, get an assessment from a physiotherapist before practising floor transitions - and always practise with clear space and something sturdy within reach.
TL;DR:
- Getting off the floor needs mobility, single-leg strength, trunk control, and balance simultaneously - and most people are missing only one of the four.
- Train the transition itself, not general leg strength; the pattern is the skill.
- Work the five progressions in order: supported kneel-to-stand, unsupported half-kneel, floor-to-stand any method, reduced-support, then loaded and distracted.
- Lowering back down matters as much as rising - that is where control is built and where falls happen.
- Two or three short sessions a week, always with clear space and something sturdy within reach.
This is the most useful five minutes of training most people are not doing. It responds quickly, it costs nothing, and being able to get off the floor without thinking about it is worth more in twenty years than almost anything else in a program.
Keep Reading
This article is for general informational purposes only and is not medical advice. Always consult a qualified health professional for guidance specific to you.